Article: How to Display Art Sets: Layout and Spacing Guide
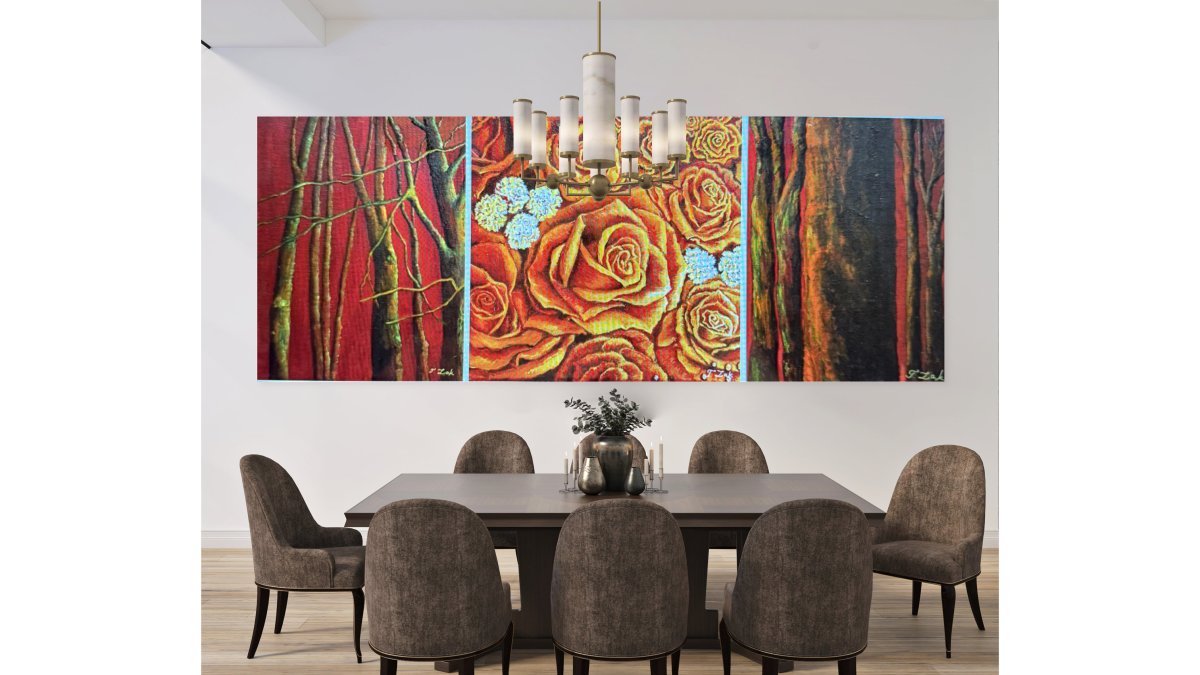
How to Display Art Sets: Layout and Spacing Guide
Table of Contents
- Before You Hang: Measuring, Tools, and Planning
- Gallery Wall Layout Ideas That Work in Real Rooms
- Best Practices for Spacing Wall Art
- How to Display Art Sets Without Damaging Walls
- Unique Wall Art for Home Office and Small Spaces
- Beyond the Wall: Shelves, Ledges, and Floor Displays
- Common Mistakes When Arranging Art Sets
- Conclusion
- Frequently Asked Questions
Last Updated: September 10, 2026
Before You Hang: Measuring, Tools, and Planning
The single biggest mistake people make when learning how to display art sets is picking up a hammer before picking up a tape measure. Planning the layout on paper first saves holes, patched drywall, and a surprising amount of frustration.
This guide walks through the full process, from measuring your wall to choosing between a gallery wall and a floating frame, so the finished arrangement looks intentional rather than improvised.
Display art sets is the practice of arranging two or more related pieces as one cohesive collection rather than hanging each work in isolation. The goal is visual balance: the group should read as a single composition while each piece keeps its own presence.
Tools You Actually Need
You need fewer tools than most hardware store displays suggest. A tape measure, a pencil, painter's tape, a level, and a stud finder cover nearly every arrangement. For hardware, keep a small kit of picture hooks, nails, and adhesive strips on hand.
- Tape measure and pencil for marking
- Painter's tape for mocking up placement
- Level (a phone app works in a pinch)
- Stud finder for heavier pieces
- Picture hooks, nails, and removable adhesive strips
Measure Twice, Hammer Once
Measure your wall width and height, then measure each frame. Sketch the arrangement on paper at scale before touching the wall. The American Institute for Conservation's guidance on safe art handling is worth reading if you're working with valuable or fragile pieces.
Gallery Wall Layout Ideas That Work in Real Rooms
Gallery wall layout ideas succeed or fail on two things: consistent spacing and a clear focal point. Get those right and almost any arrangement reads as deliberate. The layouts below are the ones that hold up in real rooms, including narrow hallways and studio apartments.

Grid Layout
A grid uses uniform frames and even gaps, and it is the safest choice for matched sets or prints from the same series. For a 3x3 grid of 11x14-inch frames, plan on roughly 2 inches between frames and a total footprint near 40 inches wide by 52 inches tall. Center the grid on the wall or on the furniture below it, not on the room. Grids look best when the outer edges align perfectly, so measure from the top-left corner of the first frame and mark every subsequent hook from that reference point rather than measuring each frame independently.
Salon-Style Layout
Salon style mixes sizes and shapes for a collected, layered look. The trick is to keep the gaps tight (1.5 to 2 inches) and to align at least one edge of each frame with a neighbor. Start with your largest piece slightly off-center, then build outward in a spiral, adding smaller pieces until the cluster feels balanced. A common pattern is to keep the total cluster width within about two-thirds of the furniture below it, so a 72-inch sofa pairs well with a cluster around 48 inches wide.
Staircase Arrangements
Staircase arrangements follow the diagonal of the steps, keeping each piece parallel to the rail. Measure the angle of the rail with a level or a phone app, then run a strip of painter's tape along that same angle on the wall as your guide. Keep the vertical gap between the tape line and the bottom of each frame consistent (3 to 4 inches works well) and space frames 2 to 3 inches apart along the diagonal. This layout reads as intentional even when the frames are mismatched, because the diagonal does the unifying work.
Small-Space and Rental Layouts
For a studio apartment or a narrow hallway, skip the wide cluster and run a single vertical column of three to five pieces. A column 12 to 16 inches wide fits almost any hallway and uses height instead of width. In rentals, lean on picture ledges instead of hooks: a 24-inch ledge holds three to four small frames and can be installed with two adhesive strips rated for the loaded weight. If you cannot drill at all, a floor-leaning cluster of three frames in graduated sizes against a wall gives the same collected feel with zero holes.
Mixing Frames, Media, and Sizes
A cohesive collection doesn't require identical frames. Mixing media works when you repeat one element, whether that's frame color, matting width, or subject matter. Pick one variable to hold constant and let the others vary. The Smithsonian's guidance on caring for your art collection offers useful context on handling mixed media, and the American Institute for Conservation's guidance on safe art handling is worth reading before you hang anything fragile or valuable.
Best Practices for Spacing Wall Art
Best practices for spacing wall art come down to one rule: keep the gaps consistent. Standard wall decor spacing runs 2 to 3 inches between frames, with the center of the arrangement at eye level, roughly 57 to 60 inches from the floor.
| Arrangement | Spacing Between Frames | Best For |
|---|---|---|
| Tight grid | 2 inches | Matched sets, small spaces |
| Standard gallery | 2-3 inches | Mixed sizes |
| Salon style | 1.5-2 inches | Collected, layered walls |
| Above furniture | 6-8 inches above | Sofas, consoles |
How to Display Art Sets Without Damaging Walls
Damage-free hanging is entirely possible with the right hardware, and it is the one part of displaying art sets that most guides skip because they assume you own the wall. If you rent, or if you just do not want to patch drywall, the methods below cover the full range from a single lightweight print to a full gallery wall.

Adhesive Strips: What They Actually Hold
Removable adhesive strips are the default rental answer, but the weight ratings on the package assume a smooth, clean, fully cured painted surface. In practice, most strips hold less than the box claims once you account for frame weight, glass, and the leverage of a frame hanging away from the wall. A safe working rule is to use strips rated for at least twice the weight of the loaded frame, and to use two strips per frame rather than one. Strips fail on textured walls, freshly painted walls (wait at least 7 days after painting), and dusty or greasy surfaces. Test one strip with a light frame for 24 hours before committing your whole arrangement.
Tension and Rail Systems
For medium-weight pieces, picture rails and tension systems are the rental-friendly upgrade. A picture rail is a narrow molding mounted near the ceiling; you hang art from it with adjustable cords or hooks, so you can move pieces without making new holes. Tension systems use a vertical pole wedged between floor and ceiling and are popular in apartments where drilling is prohibited entirely. Both let you rearrange a set seasonally without touching the wall.
Picture Ledges and Floor Leaning
Picture ledges are the lowest-risk option for a set of small to medium frames. A 24-inch ledge typically mounts with two screws into studs or with heavy-duty adhesive strips rated for the loaded weight, and it holds three to four small frames leaning back at a slight angle. Floor leaning works for larger canvases and oversized prints: rest the bottom edge on the floor or a low shelf and lean the top against the wall, using a small rubber bumper or museum putty at the base to keep it from sliding. This is the standard approach in galleries and it costs nothing.
Hanging Heavier Pieces Safely
Once a frame crosses roughly 20 pounds, stop relying on adhesive and use a stud finder to locate framing, then drive a screw or a rated hook into the stud. For pieces between 10 and 20 pounds where no stud is available, a hollow-wall anchor rated for the load is the right call. Always hang from two points for anything wider than about 16 inches, so the frame cannot rotate or swing.
Unique Wall Art for Home Office and Small Spaces
Unique wall art for home office settings should anchor the space without overwhelming it. In small rooms, a vertical column of three or four pieces uses height instead of width, leaving desk and shelf space clear. A single statement piece often outperforms a crowded wall.
Our hand-embellished limited edition prints work well here, since each piece carries individual detail that rewards a closer look in a compact workspace.
Beyond the Wall: Shelves, Ledges, and Floor Displays
Not every piece belongs on a hook. Picture ledges let you layer art prints and swap them seasonally. Propping framed work on a mantel or shelf creates a relaxed, collected feel. Floor stands suit larger canvases and give a room a gallery-adjacent look.
Common Mistakes When Arranging Art Sets
The most common mistakes are hanging too high, spacing unevenly, and treating every piece as equally important. Art hung at eye level for standing viewers often sits too high above furniture. Uneven gaps make even a good collection look careless.
Conclusion
Getting an arrangement right takes a little planning and a willingness to rehang once. If you want pieces that make the process rewarding, we offer hand-embellished limited edition prints and curated art sets, each with individual detail that no two buyers share. Our sets ship worldwide and suit everything from a small home office to a full gallery wall. Shop new arrivals and find the set that fits your space.
Frequently Asked Questions
What is the best way to display a set of art prints?
Treat the set as one composition rather than individual pieces. Lay everything on the floor first and arrange until the spacing feels even. For a grid layout, keep 2 to 3 inches between frames. For a salon-style arrangement, use 1.5 to 2.5 inches. Hang the center of the whole group at 57 inches from the floor, which is standard eye level for most viewers.
How do you space art sets for a balanced gallery wall?
Measure the gap between each frame and keep it consistent across the entire arrangement. A good rule: the space between frames should be roughly half the width of the narrowest frame in the set. If your smallest frame is 8 inches wide, aim for 4-inch gaps. Step back every few pieces to check visual balance, since even spacing reads as intentional while uneven gaps look accidental.
Should art sets be framed identically or mixed?
Both work, but they create different moods. Identical frames give a clean, modern grid feel and let the artwork carry all the visual weight. Mixed frames, especially in a salon-style hang, feel collected and personal. For a cohesive look with mixed frames, keep one element constant: either the mat color, the frame finish, or the overall frame width.
How can I display art sets in a rental without damaging walls?
Adhesive strips rated for the weight of your frame work well for lightweight prints under 5 pounds. For heavier pieces, use a picture rail or a freestanding floor stand. Another option: rest framed pieces on a picture ledge or mantel and lean them against the wall. Command strips leave no holes, and most come off cleanly if you follow the removal instructions.