How to Arrange Statement Art Above a Desk
Table of Contents
- Measure Your Space and Desk Dimensions
- Choose the Right Size Artwork for Your Wall
- Best Contemporary Art for Office Walls
- How to Hang Art Above a Desk Safely and Securely
- Position and Center Your Statement Artwork
- Gallery Wall Layout for Home Office Spaces
- Common Mistakes to Avoid When Arranging Desk Art
- Frequently Asked Questions
Last Updated: October 7, 2026
Measure Your Space and Desk Dimensions
Before you buy or hang anything, measure twice. Getting the dimensions right is where most people stumble when learning how to arrange statement art above a desk.

Start with your desk width. Measure from one end to the other. Most desks range from 48 to 72 inches wide. Your artwork should be roughly 50 to 75 percent of that width. A desk that's 60 inches wide pairs well with art that's 30 to 45 inches across.
Next, measure the wall space above your desk. How much vertical room do you have before you hit a window, shelf, or the ceiling? Measure from the top of your desk to the highest point where hanging art still looks intentional. Most walls offer 36 to 60 inches of usable space above furniture.
Check the height of your desk chair. When you're seated and looking straight ahead, your eye line should land roughly in the center of your artwork. This is the seated viewing angle that matters most in an office or workspace.
Finally, look at the wall itself. Is it drywall, plaster, or brick? Different wall types need different hardware. Drywall anchors work for lighter pieces. Plaster needs special anchors that won't crumble. Brick and concrete require masonry bits and heavy-duty fasteners. Knowing your wall type before you drill prevents mistakes.
Choose the Right Size Artwork for Your Wall
The relationship between your furniture and your artwork determines whether the space feels balanced or awkward. This is the core principle behind how to arrange statement art above a desk.
A statement piece should feel substantial without overwhelming the desk below it. If your artwork is too small, it looks lost and insignificant. Too large, and it dominates the room and makes the workspace feel cramped.
Use this sizing guide:
| Desk Width | Recommended Art Width | Art Height | Best For |
|---|---|---|---|
| 48 inches | 24-36 inches | 18-28 inches | Compact desks, small rooms |
| 60 inches | 30-45 inches | 24-36 inches | Standard home offices |
| 72 inches | 36-54 inches | 28-42 inches | Large desks, open spaces |
For a single statement piece, aim for art that takes up about two-thirds to three-quarters of your desk width. This creates visual balance without looking cramped or excessive.
Consider the frame depth as well. Canvas installations and thick frames add dimension. A 2.5-inch deep frame creates more visual presence than a thin 0.75-inch frame. Depth matters, especially in natural or artificial light that casts shadows across the surface.
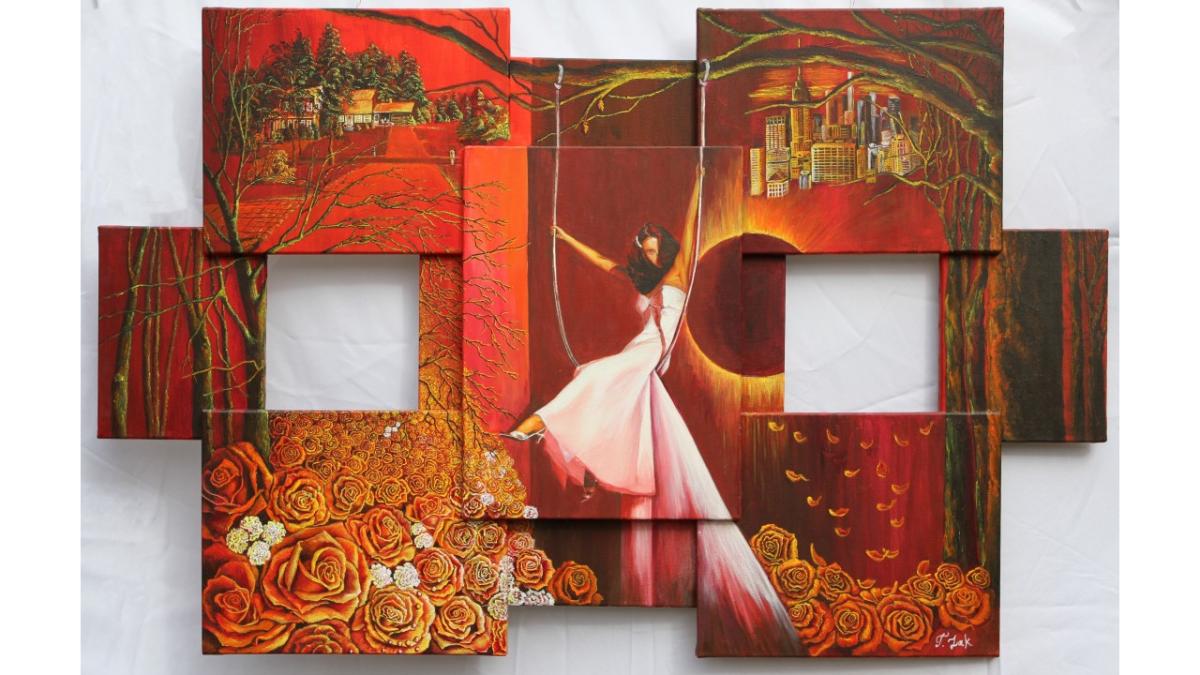
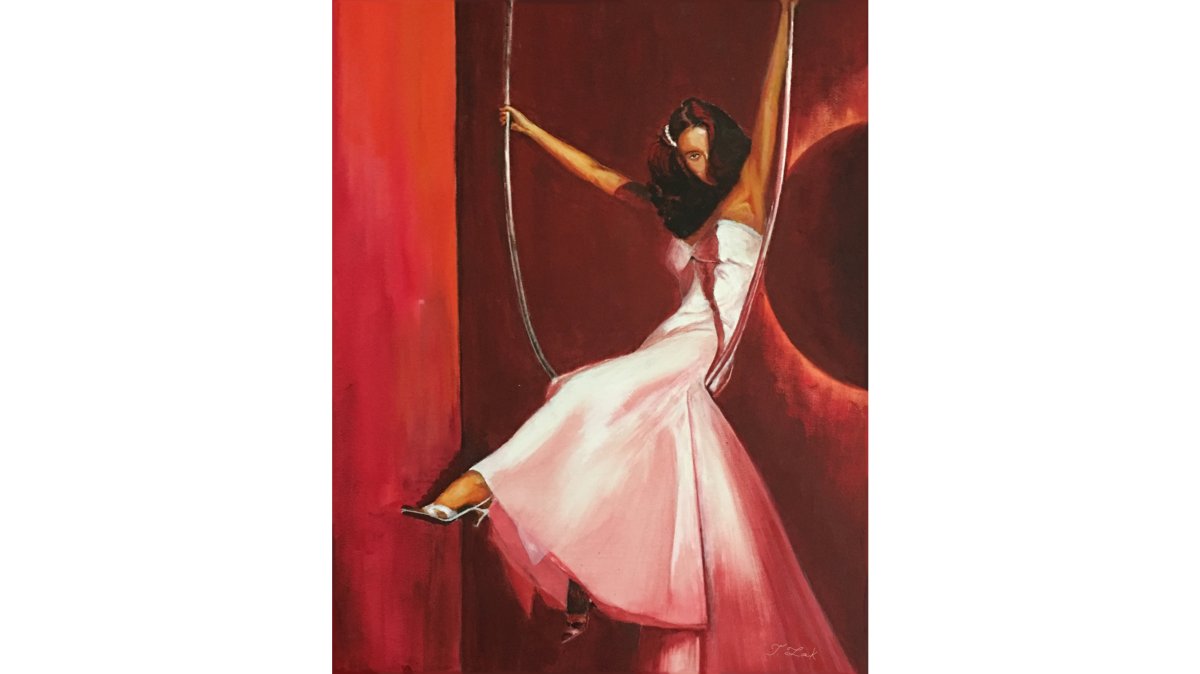
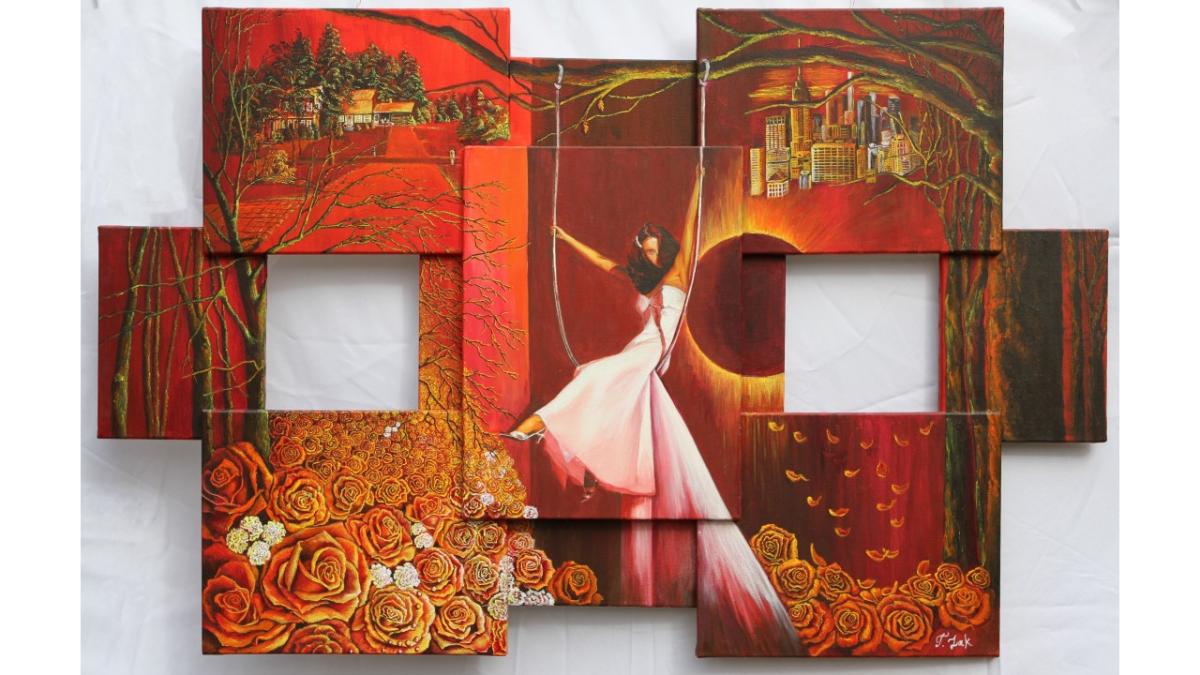
The Swing of Life™ installation, for example, measures 42 inches by 66 inches. It works beautifully above desks in the 50 to 72-inch range, creating a focal point that feels intentional and grounded without consuming the entire wall.

Best Contemporary Art for Office Walls
Office walls benefit from art that reflects and inspires. Contemporary pieces work particularly well because they often balance abstraction with emotional resonance. They don't demand constant interpretation, but they reward quiet reflection.
When selecting contemporary art for office walls, look for pieces with:
- Color palettes that complement your workspace. Neutral walls pair with bold, saturated colors. Colorful walls need softer, muted tones to avoid visual chaos.
- Compositions that feel grounded. Art with strong horizontal or vertical lines creates stability. Chaotic compositions can feel unsettling in a space where you focus on work.
- Emotional depth without heaviness. The best office art invites contemplation without demanding it. It should enhance focus, not distract from it.
- Durability and fade resistance. Office art lives under artificial lighting and sometimes natural light. Hand-enhanced pieces with quality materials hold their character over years.
Hand-embellished contemporary prints offer a middle ground between mass-produced prints and expensive originals. Each piece carries the artist's hand but remains accessible. This approach bridges the gap between reproduction and original art, which many professionals seek for their workspace.
Pieces like Night Blues of the Suburbs work well in office settings. The cool blue tones create calm. The composition, a softly illuminated house among trees, suggests quiet contemplation without distraction. At 24 by 24 inches, it fits most office walls without overwhelming them.
How to Hang Art Above a Desk Safely and Securely
Hanging art safely means choosing the right hardware for your wall type and the weight of your piece. Getting this wrong risks damage to both the wall and the artwork.
Step 1: Identify your wall type and weight capacity.
Drywall anchors typically hold 10 to 25 pounds. Plaster walls need special anchors rated for plaster. Brick and concrete require masonry fasteners. Check your artwork weight, most framed pieces under 30 inches weigh 8 to 20 pounds.
Step 2: Choose appropriate hanging hardware.
For drywall: use toggle bolts or heavy-duty picture hangers rated for your piece's weight. For plaster: use plaster-specific anchors that grip without crumbling. For brick or concrete: use masonry anchors and a drill with a masonry bit.
Step 3: Find the center point.
Measure your wall width. Find the midpoint. Mark it lightly with a pencil. This is where your artwork's center should align.
Step 4: Mark the hanging height.
Measure from the top of your desk to your desired gap (typically 4 to 6 inches). Mark this point. Then measure from the top of your artwork to its hanging hardware.
Step 5: Use a level and drill carefully.
Place your level at the marked point. Drill pilot holes slightly smaller than your anchors. Tap anchors in gently. Don't force them, they should seat smoothly. Screw in your hardware by hand first, then use a power drill if needed.
Step 6: Hang and adjust.
Swing of Life™ - Hand-Embellished Collector Edition Installation →
Place your artwork on the hardware. Step back and check alignment. Use a level to verify it's straight, not just "close." Adjust if needed before tightening everything fully.
Position and Center Your Statement Artwork
How to arrange statement art above a desk comes down to three things: centering, spacing, and alignment with your seated eye line.
Centering horizontally means aligning your artwork's center with your desk's center. Measure your desk width, find the midpoint, and align your artwork's center line there. This creates visual balance and feels intentional rather than accidental.
Spacing vertically requires the right gap between your desk and artwork. A gap of 4 to 6 inches is standard. This distance prevents the art from feeling like it's crushing down on your workspace.
Alignment with your eye line matters most for office work. When seated at your desk, your natural eye line should fall roughly in the center of the artwork. This positioning creates a focal point that feels natural and calming.
For larger installations, consider the composition itself. If the piece has a clear focal point, a figure, a bright area, or a visual anchor, position that focal point slightly above your natural eye line.
The Swing of Life™ installation, at 42 by 66 inches, commands attention when properly positioned. Its multi-layered composition naturally guides the viewer's eye through the piece.
Gallery Wall Layout for Home Office Spaces
A gallery wall transforms multiple pieces into a cohesive statement. This approach works when you have several smaller pieces or when you want to create visual richness without a single oversized artwork.
Plan before you drill. Lay out your pieces on the floor first. Arrange them until the composition feels balanced. Take a photo. This prevents costly mistakes and gives you a clear reference while hanging.
Space pieces consistently. Use 4 to 6 inches between frames. Consistent spacing creates rhythm and feels intentional. Uneven spacing looks accidental.
Choose a layout pattern. Common patterns include:
- Grid layout: Rows and columns of equal-sized frames. Clean, organized, professional.
- Linear layout: Frames in a single horizontal or vertical line. Minimalist and modern.
- Salon style: Mixed sizes and spacing arranged organically. Artistic and personal.
- Stacked layout: Two or three pieces stacked vertically, centered above your desk. Creates height and drama.
For office spaces, grid or linear layouts tend to feel more professional. Salon-style galleries work well in creative spaces where personality matters more than polish.
Use picture ledges for flexibility. Ledges hold artwork without permanent holes. You can rearrange, add, or remove pieces as your taste or workspace evolves. A 24-inch ledge above your desk can display rotating artwork or a curated set of pieces.
The A Four-Panel Journey in Balance collection exemplifies how multiple pieces create narrative. The four 16 by 16-inch panels tell a story, suburban home, roses, city skyline, roses again. Arranged as a cohesive set, they create visual depth and emotional resonance that a single piece might not achieve.

Common Mistakes to Avoid When Arranging Desk Art
Most people make the same errors when learning how to arrange statement art above a desk. Knowing these pitfalls helps you avoid them.
Mistake 1: Hanging art too high. Many people place artwork high on the wall to "maximize space." This breaks the visual connection between your desk and the art.
Mistake 2: Choosing art that's too small. Undersized artwork looks timid and gets lost visually. Your statement piece should command attention without overwhelming.
Mistake 3: Ignoring wall type and weight limits. Hanging heavy art on inadequate anchors risks the piece falling. Worse, it damages your wall. Know your wall type. Use appropriate hardware.
Mistake 4: Misaligning the piece. Crooked art undermines everything else. Use a level. Check alignment before fully tightening hardware. Spend the extra minute getting it straight.
Mistake 5: Pairing art with wrong furniture scale. A tiny piece above a large desk looks lost. A massive piece above a small desk overwhelms.
Mistake 6: Neglecting lighting. Glare on artwork ruins the viewing experience. Position lighting sources so they illuminate the piece without creating harsh reflections.
Mistake 7: Forgetting about maintenance. Dust settles on artwork and frames. Hand-embellished pieces need gentle care to preserve their texture and depth. Use a soft, dry cloth.
Arranging statement art above your desk transforms your workspace from functional to inspiring.
At Tatyana Zak, we create hand-embellished contemporary pieces designed to resonate emotionally and visually.
Frequently Asked Questions
How high should artwork be hung above a desk?
Position the center of your statement art 4 to 6 inches above the back of your desk or chair. If your desk faces a wall, hang the artwork so its center sits at eye level when you're seated, roughly 57 to 60 inches from the floor. This creates visual balance and prevents the piece from feeling too high or disconnected from your workspace. Adjust based on ceiling height and your seated eye level.
What size statement art works best above a desk?
Your artwork should be two-thirds to three-quarters the width of your desk. For a standard 48-inch desk, choose a piece 32 to 36 inches wide. If your wall is narrow or your desk is compact, a 24-inch square or 20-by-24-inch vertical piece works well. Hand-embellished contemporary pieces like the Night Blues of the Suburbs (24 by 24 inches) fit most office desks without overwhelming the space.
Should I center my statement art directly over my desk?
Yes, center your artwork horizontally over the desk for visual balance and focal point alignment. This creates a composed, intentional look that draws the eye naturally to the wall. If your desk is offset in the room, center the art over the desk itself, not the wall. This anchors the furniture arrangement and makes the space feel organized and thoughtful.
How do I securely hang heavy statement art above my desk?
Use wall anchors rated for your artwork's weight, or mount directly into wall studs for maximum security. For canvas installations like Swing of Life (42 by 66 inches), use heavy-duty picture hangers or mounting brackets. Locate studs with a stud finder, or use toggle bolts if studs aren't available. Check the wall type, drywall, plaster, or brick each require different hardware. Always use at least two hanging points for large pieces to prevent tilting.